Neutis Flasher GUI
Flasher has user friendly graphical interface.
Download and run
Neutis Manufacturing Flash Tool is available for Linux and Windows
Linux
Do not launch Neutis Manufacturing Flash Tool with sudo on Linux
Deb package
-
Using terminal navigate to the directory with the downloaded file and install it:
sudo dpkg -i neutis-manufacturing-flash-tool_1.2.1_all.deb -
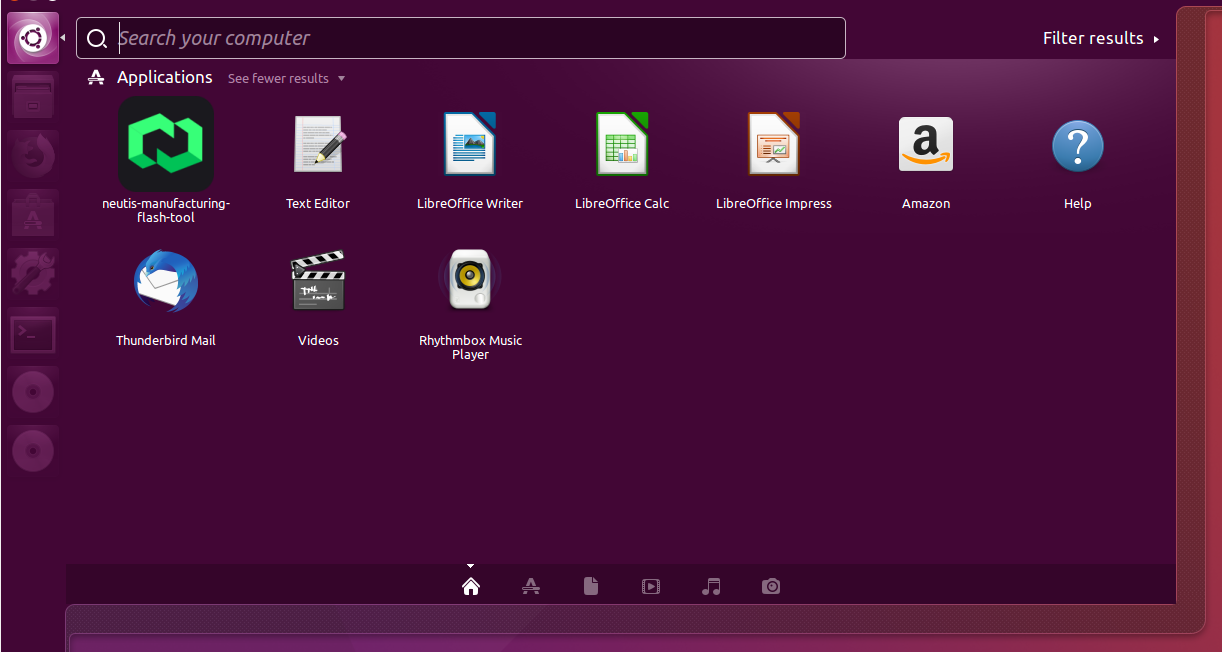
After installation, you'll find the app in the applications list
Tar archive
-
Using terminal navigate to the directory with the downloaded archive and extract it:
cd ~/Downloads tar -xvf neutis-manufacturing-flash-tool_1.2.1.tar.bz2 cd "Neutis Manufacturing Flash Tool"/ -
Run installation script to set up udev rules for Neutis:
sudo ./install.sh -
Launch the application:
./neutis-flasher-start.sh
Log files can be found at "~/.local/share/Emlid/Neutis Manufacturing Flash Tool/logs/"
Old versions
- neutis-manufacturing-flash-tool-v1.1.1.tar.bz2
- neutis-manufacturing-flash-tool-v1.1.0.tar.bz2
- neutis-manufacturing-flash-tool-v1.0.0.tar.bz2
Windows
- Download neutis-manufacturing-flash-tool_1.2.1_setup.exe
- Launch it and follow the installation wizard
Installer may hang on 50% for a few minutes to install drivers for Neutis.
- After installation you'll find Neutis Manufacturing Flash Tool shortcut on the desktop and in the Start menu
Log files can be found at "C:\Users\<username>\AppData\Local\Emlid\Neutis Manufacturing Flash Tool\logs"
During the first app launch, Windows may request the network access as Flasher's inner architecture is based on client-server structure. The application doesn't send any data over the Internet.
Old versions
Flashing process
Session starts with initial window prompting you to choose mode (flashing, testing or both).

In Flashing + Testing mode you also need to select firmware image.
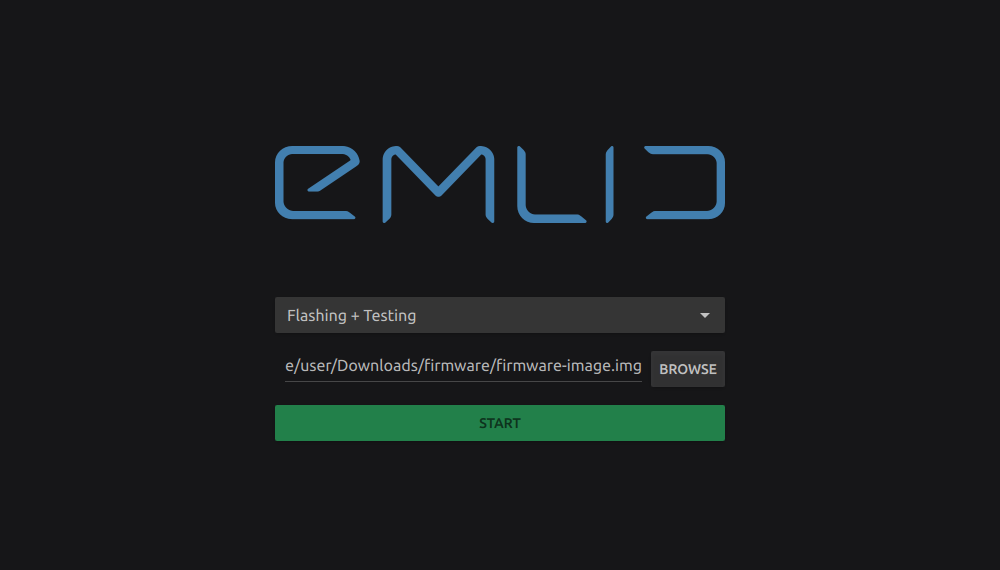
Press Start to proceed.
Now you can connect Neutis units to the PC and flasher will start doing its job. From this moment the app doesn't require any user input.
You will see as many progress bars as many devices you have connected.
The whole flashing procedure consists of 3 steps:
- Device initializing
- Firmware flashing
- Hardware testing
In case something went wrong during initialization step and error occured, please disconnect Neutis from PC to prevent unit overheating
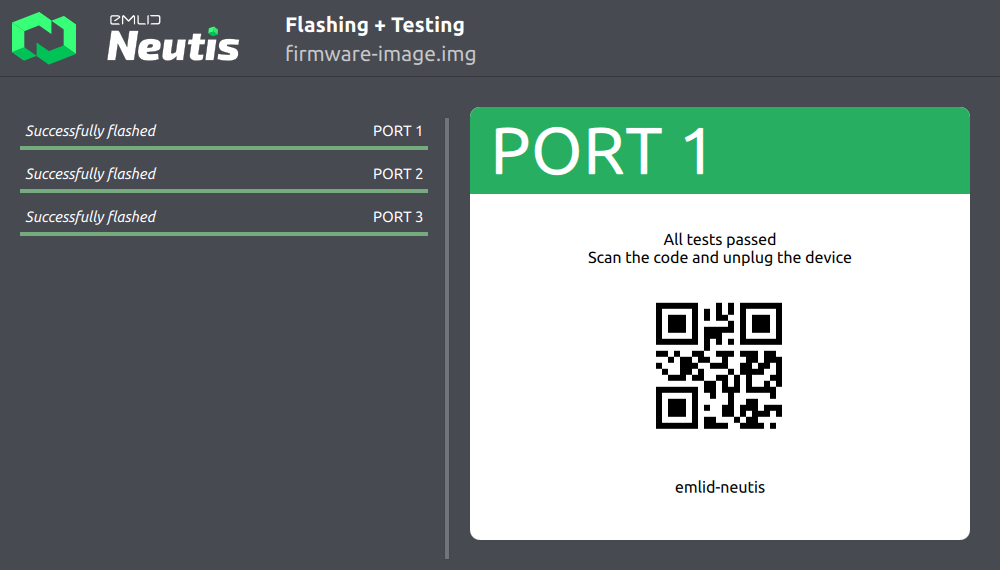
At the end of hardware testing Neutis sends self-tests results and Flasher shows QR code unique for each Neutis.
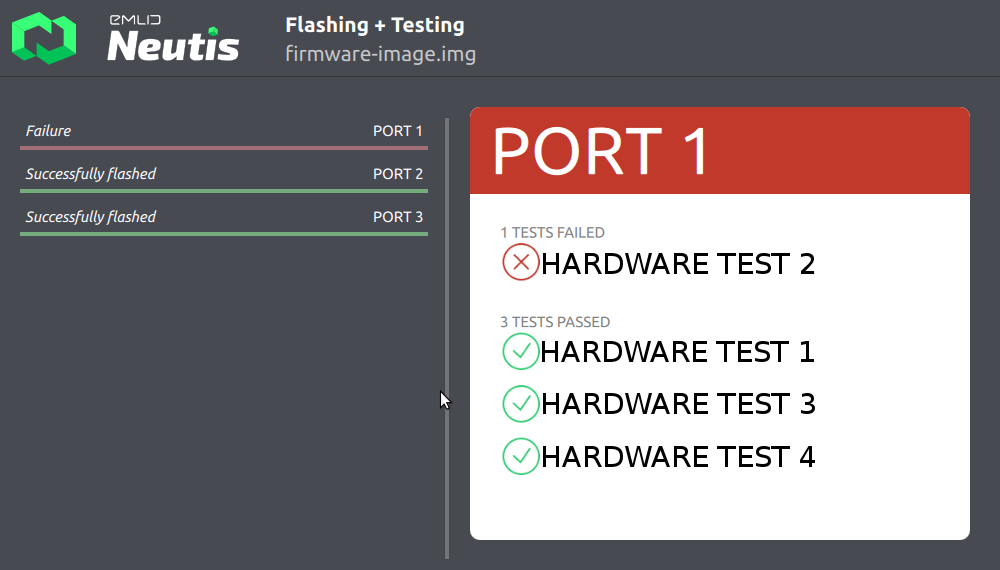
In case one or more tests have failed you will see a list of results.
Here an example of the results view: